...which, I think, may already be the title of a similar post.
Hang on, I'll check...
(flip, flip, flip)
(waiiiiit a minute, this isn't on paper...)
Anyway, I have done many, many things on the house since the last post. No, really, you must believe me. What exactly, I can't remember, because, you know - so many things! Yesterday I do remember. My friend Amanda wants to... learn about home repair? Is bored? Whatever the reason, she's been asking to come over and help me on projects in exchange for food and drink, which is exactly in my price range dontchaknow. While the initial intent was to tackle getting the gutters back up, there's still a bunch of pain in the neck prep work before we can even put the patches on the old holes, so I left that for the day.
Instead, we wound up rearranging a huge amount of stuff between the shed and the back room, freeing up tons of space, making tools accessible, and hitting upon the incredible conclusion that, of all the tools and materials that need to be in storage right now, that maybe that pile of plate glass panes that was in the shed could be what gets stored in the basement. You know, instead of anything wood or metal.
Geniuses, both of us.
Onwards!
Monday, August 8, 2011
Tuesday, July 26, 2011
Fans installed
Upstairs ready for new tenant arrival.
And somehow I feel like I'm just losing days of time here. I think it's the fact that I don't have internet at the house right now, which has been wonderful for productivity (I wander outside and weed or move things as opposed to getting distracted by grantland.com or whatever... for... hours) but I think it screws with my sense of days since I don't look at my online calender as frequently, I don't see days listed on web news stories, etc etc.
First world problems of the Gen Y existentialist variety...
Saturday, July 23, 2011
Friday, July 22, 2011
You know why I'm sitting in the green room watching Hulu right now?
Because I did stuff all day today and I deserve it, that's why.
Up early to scrape the last of the gravel up and pile it by the parking spaces. Realized that the back yard gets more sun than I remembered, especially early in the morning, which is not good when the temperature is expected to be near triple digits. Moved all the bricks that had been supporting the big pile of wood to where the gravel had been out back, thus freeing up another ten feet of driveway.
Drove north (did anyone ever say 'Go north, young man! (or woman!)'? Somehow I don't think so, or at least not seriously.), even though I always swear to avoid going up Rt. 58 and into Elyria or Lorain around midday. Stopped for lunch at Blue Sky Diner because a) it's delicious if terrible b) I was hungry and c) it meant I could get out of the car after stop and start traffic on a bright, sunny day where the temperature was expected to be near triple digits. The plan - and you know what they say about plans - was to stop by the Restore, then Goodwill/Sears (I had a gift card), then Lowes, then a used car dealership looking for, in total:
- one brake light bulb for my Landcruiser
- plastic sheeting, for to well cover the lumber
- a ceiling fan/light unit for one of the upstairs bedrooms
- a car with better gas mileage
- anything else that looks interesting/useful
Here is what I did get:
- two brake light bulbs for my Landcruiser
- plastic sheeting, for to well cover the lumber
- two green glasses (I love those for some reason) and a picture frame (Goodwill, in case you were wondering)
- two awesome wood windows with original hardware that I have no need for at the moment but were in too good condition to pass up
After sitting in the car for way longer than I wanted to during all this (you know what's weird? When your forearms sweat because they're in the sun while your hands are on the wheel. It's weird, trust me. And mildly unpleasant. And creepily like that scene on the Golden Gate Bridge in 'The Core' which is an awesome movie but I digress.) I saw a very threatening sky, and knowing that thunderstorms were expected this evening I scrapped the last two stops on the trip and returned home, for to well cover the lumber.
Oh, first I had to spend fifteen minutes in the parking lot at Sears trying to pull out the old burned-out brake light because I am a dumbass and never remember things like 'these type of lights are push and twist, and then they pop right out'.
Home, to lay a tarp over all the bricks (keeping ground moisture seeping into the low boards to a minimum) then move the roughly forty planks to their new home, cover them with the plastic sheeting, and clean up the various planks and beams scattered about the yard on which the boards had been drying. Here's my clever tip for the day that most people already know but too many of us forget - water does a spectacular job of transferring heat, part of the reason that we sweat, so if you're working outside, especially when doing something physical, douse - just, seriously, *douse* - yourself with some water, especially the top of your head, every so often. It'll keep you from having heat stroke and it'll keep you working steadily instead of crashing to a halt while you move old oak boards in a desperate attempt to get them stacked, covered, and weighted down before the impending torrents... impend? on us? I did so, barely, powering through on endorphins and the thought of an orange soda from the vending machine in the green room (the machine never gets restocked during the summer, because corporate America hates actors that's why). Success. Sweaty, dirty, tiring, success.
Does this sound like a rant? I hope not. I don't like ranty-blogs. I mean, I don't really like most 'here's my day' blogs anyway and this has turned into one of those as of late, so maybe some more self-loathing is in order.
Anyway, now I have my driveway back! And the lumber has been well checked, mostly dried, and safely stowed. And I've been watching TV for an hour and a half now before Hamlet. Good times. Good times.
Thursday, July 21, 2011
Oh man! Today I did stuff!
97 degrees today and I decided to work outside most of the day. With the breeze, working mostly in the shade, and drinking plenty of water, it was fine (I think - check back tomorrow to see if I'm dead). Peaceful at times, actually - a good day's work in the great outdoors, or whatever a small backyard is considered.
All the joists are laid out and soaking up rays. 95% of the gravel has been moved from the yard to the new parking spaces, to be spread about soon. Tomorrow I'll flip the boards and figure out how to stow them where the gravel was, thus freeing up my driveway for, y'know, a car or something.
This would probably make more sense with pictures. And it would probably matter more if anyone were reading this blog aside from me. You are? Well click on an ad to say hi or something.
Tomorrow: more stuff. Yes.
Wednesday, July 20, 2011
Lumbering about with lumber
Remember the other big pile of wood? With two straight days of near triple digit sunny weather, I'm temporarily covering my lawn with the stuff to dry and de-mold it, and see what condition it's in. Then maybe I'll sand some of it, but mostly I think I'll just be wrapping it tightly in plastic and putting it somewhere else in the yard for use next year. Oh the planning...
Tuesday, July 19, 2011
Paint paint paint paint
On the east side, this time. Pictures coming once everything is done, which might be by month's end oh the optimism.
Monday, July 18, 2011
Oh I'm a lumberjack...
Best workout in a while - taking down parts of well-established buckthorn *trees* using a hatchet. I recommend a soundtrack of late-80s punk, or the NPR podcasts I was actually listening to.
Thursday, July 14, 2011
Cheap building materials you say?
In my never-ending quest for the right fittings for my reclaimed-materials bookcase, I traveled to my local Habitat for Humanity Restore, a veritable treasure trove of stuff I shouldn't be thinking about buying because I don't really at this moment have a use for it. Windows and doors, plumbing fixtures, contractor remainders of all types - it's a great place to pick up cut-rate materials, although you can never be sure what will be in stock. I left with four 4x4 beams (non pressure treated) at $2/piece. Worth checking out the one in your area.
Wednesday, July 13, 2011
Weeding
Extensively throughout the yard(s), including a real thorough hack at the stuff growing around my old dwarf apple tree. (In an awesome turn of events, both the dwarf tree and the young apple I planted next to it last year are both bearing fruit; small and probably tart since I haven't been spending enough time on them, but fruit nonetheless.)
Of particular interest was the discovery of why buckthorn shoots keep cropping up around the dwarf apple - there's a thick stem *ball* that established itself *under* a low-leaning branch. No way to dig this one up, so I've cut all the shoots, dug up the few seedlings nearby, and am now talking with a brother of a friend who is a forester about paint-on pesticides for buckthorn. More updates once the devilish weed is dead.
Of particular interest was the discovery of why buckthorn shoots keep cropping up around the dwarf apple - there's a thick stem *ball* that established itself *under* a low-leaning branch. No way to dig this one up, so I've cut all the shoots, dug up the few seedlings nearby, and am now talking with a brother of a friend who is a forester about paint-on pesticides for buckthorn. More updates once the devilish weed is dead.
Tuesday, July 12, 2011
Excitement on all sides
1) I finished drilling all the beams for the bookcase.
2) A '63 Cadillac plowed into my neighbor's rose bushes while trying to avoid another neighbor's pickup truck at an intersection. No one was hurt. The image of a giant boat of a car nestled amongst foliage, with a flattened stop sign on the ground nearby, will remain in my mind for a while though.
2) A '63 Cadillac plowed into my neighbor's rose bushes while trying to avoid another neighbor's pickup truck at an intersection. No one was hurt. The image of a giant boat of a car nestled amongst foliage, with a flattened stop sign on the ground nearby, will remain in my mind for a while though.
Monday, July 11, 2011
More hammering
And more scraping, trying to finish off the prep work on the east side before a new tenant comes into those rooms.
Friday, July 8, 2011
Did things?
Did I do things? I like to think I've been doing things that don't involve betraying my childhood friend and then dying in England (true story; just not mine), but I can't say for sure.
Such nice weather today - let me get some things posted for my actual job, and then go paint something.
Such nice weather today - let me get some things posted for my actual job, and then go paint something.
Tuesday, July 5, 2011
Hey here's a good idea for homeowners
No really, it's one of those things that, if you haven't done it already, you'll smack your head when you read it:
Drill holes in the bottom of your garbage cans/recycling bins so rain can't collect in them.
That's it. I did this soon after moving into my house, although after one heavy rainstorm. It's one of those things that you won't notice the positive effects so much as you won't notice the negative ones. Yes. Sentence structure.
For those craving specifics: I think I used a 3/4 inch spade bit on the recycling bins (our town uses 3 gallon buckets for recyclables), one hole dead center; and a 3/8" or so bit several times on the bottom of the trash can. You shouldn't be impacting the structural integrity of the can if you drill 2-3 holes spaced out from each other and avoiding any seams.
Monday, July 4, 2011
Paint goes on...
There are four sections of exterior wall that still need painting, and the plan is that they will all be completed this summer - maybe even this month if the weather continues to cooperate. All are second-story sections, three on the west wall (the windward side of the house, so these probably should have gotten attention sooner; at least the shingles are in good shape) and one on the east.
Other things have happened on the house since I last wrote, of course, but today's *fretfully* exciting update is that one of the four sections - the smallest, easiest to tackle, and least in need of tackling section, that which is north-most on the west side) is almostverynearlynotquite done! All it needs is to paint the five foot by one foot section that looks remarkably like the outline of a ladder's top.
Also, I swear to some overhead being that the gravel driveway expansion is nearly finished and ready for testing. In the words of Hamlet's father: SWEAR!
Update (Tuesday night): The five square feet of unpainted wall have been painted. Tada!
Saturday, July 2, 2011
Today you may have seen me:
- Drilling holes in the bookcase beams
- Moving more gravel - I think it's just about done
- Trimming a tree
But only if you were walking down my street at the very moment I was doing those things. For the rest of you - trust me; they happened.
Wednesday, June 29, 2011
Up and at 'em
This morning, accomplished a few things, which is good because my afternoons are all Hamlet and my evenings are becoming time for other things. Plus no one likes hammering in their neighborhood at 7pm.
- More leveling and gravelling - almost done, maybe, I think, perhaps
- Nailed part of one wall of shingles, almost ready to paint.
- Transplanted another tree from the edge of the new parking spaces to replace the old dying walnut in the backyard. We'll see if I didn't kill this one like I did the last. Note: When digging up a seedling, always dig wider than you'd think, then deeper than you'd think, to avoid the taproot.
Tuesday, June 28, 2011
Today...
Did some scraping on the west side of house to prep for nailing and maybe painting tomorrow AM.
Monday, June 27, 2011
Sunday, June 26, 2011
More stuff
A gravel expansion of angled parking spaces next to my still technically gravel driveway continued apace today. Details and pictures soon, when it's complete. So maybe not so soon, really.
And also today, two revelations about mulberries:
1) They are delicious. I knew they were edible, and had even started looking up things one can make with them online, but hadn't actually tried real nice ripe ones until today whilst wandering around the yard talking on the phone with an old friend.
2) They stain things. I knew they stained my hands and the tarps on which they've fallen over the last few years, but I just realized that maybe they could also stain wood. This could add an interesting, very purple, twist on projects in the future.
Related - noticed that the black walnut by the driveway is bearing fruit this year, so homemade stain plans are definitely back on the agenda for fall.
Monday, June 20, 2011
Stuff happened...
But I was either in Hamlet rehearsals or sick over the weekend, and thus wasn't really a part of them.
Work resumes on the house later today. I think.
Work resumes on the house later today. I think.
Wednesday, June 8, 2011
It continues to be the little things...
- Shopped for flanges for this really clever bookcase thing I'm building. No really, it's going to be awesome. Someday. Particularly if I can find the pipe fittings I want ideally a) with a patina and b) for not $10-20 apiece. Someone just suggested the local Habitat ReStore which I'll need to look at soon.
- Moved things about in the shed. Again. I really should have built a garage. Let this be a lesson to all new homeowners, especially those who like to build things like I do. You're going to need space for the tools and supplies. More space than you think.
- Measured the doors I rescued from a house that was slated for demolition to see if I can swap any in for my upstairs bedroom doors. The upstairs doors need restoration attention, which they probably won't get for a while, so meanwhile I think giving them temporary replacements (and similarly old replacements at that) is a good idea.
Monday, June 6, 2011
Back to the small stuff
In an effort to keep myself blogging, but also to demonstrate to anyone reading this (Bueller?) how it's a lot of little things that eventually get you a really nice looking old house, I'm going to try and post, often sans pictures, what I've done on the house each day, even if that's just prep or minor work.
Today -
Today -
- replaced several shingles (there's a post in itself...)
- prepped a bunch more for painting
- marked off the beams for an all-reclaimed-materials bookcase
- got the drill press running and did a test drilling for said bookcase
- trimmed off some old shingles so they can be reused
This was a day off from OSTF, though, so no promises anything this exciting will happen the rest of this week...
Monday, May 16, 2011
Rabbit-proof fence?
Another old project which I am only now posting. With plans for some garden space (in place of lawn) came the realization that there are rabbits bounding about my town much of the year. Some fencing was in order.
First, to prep the space... I pulled sod in a roughly 8' x 4' rectangle next to the existing flower beds, and I think I came across a footer or something connected with the old old old porch stairs that likely came off the front under the peaked roof.


With the space cleared and major rocks and roots removed, I laid a 'path' using salvaged bricks so I could access both 'plots' easily.

Fill in with several inches of topsoil...

And now for the fences. These held up fine in the ensuing winter, but they were definitely a temporary solution - although a good way to use existing materials, I think. I started by pulling the screen - some fiberglass/nylon, some maybe aluminum - from the frames of old storm windows I hadn't yet dragged to the scrap yard.

Once again, my 1"x1" poles were turned into stakes with a quick miter. I then cut the screen maybe 5 inches wide and attached the runs to stakes with ye olde staple gun.

As with the raised beds out back I found it easiest to attach no more than two walls at a time, and then complete the sides after the first walls are in the ground. You may also want to carve some trenches along where the screens will run first (you want them to be even a little bit underground so gaps don't open up between earth and barrier) to make it easier for yourself as you lay in the stakes, the screens, and then refill with some dirt.

And here's what you get when you drop some plants in your now rabbit-proof plots:

Update:
And here's about half of the unused tomatoes at the end of the season. Half. The rest went to a friend who swears she could live on fried green tomatoes, and had to prove it after my delivery.

Sunday, February 27, 2011
Stair carpeting
This project only took an afternoon - a few hours, really, not counting picking up materials - making me wish I hadn't put it off for so long under the assumption it would take forever. Like so many other things in my house, such as that bathroom rewiring project, or learning Spanish.
Learn from my mistakes/laziness and, if you have a set of bare wooden stairs of your own, don't wait to get them covered with a runner. It reduces noise by a ton and cuts down on wear to boot.


I'd picked up a roll of carpet remainder for $15 at Home Depot a while back - the color matched what I was thinking of doing upstairs, and the width was less than the width of the stairs. All in all, it was a serendipitous find, but you should be able to locate a strip of carpeting that meets your needs by heading to any floor-covering store. (Yours, for example, may even reach all the way to the bottom of the staircase. I wasn't concerned about that because most of the creaking noise I wanted to muffle came from the top of the stairs, and this is definitely a semi-permanent renovation, much more functional that aesthetic.) A floor coverings store is also a good place to pick up the carpet padding you'll need:

Get the heaviest type they have to muffle the most sound. A good set of shears (I still use a pair made by Chicago Cutlery for this and many other projects) will cut through the padding without much problem.
A note on amounts - the way I did this project, I only put padding on the stair treads, not underneath all the carpet, not even on the risers which some online plans suggest. As a result, I had bought enough carpet padding to go beneath the total square footage of the carpet runner, but wound up using less than half of it. To follow these plans, you're only cutting out rectangles that are roughly the depth of the tread minus one inch and the width of the *carpet* minus two inches. You might consider buying less padding as a result.

A measuring tape, sharpie, straight edge, and shears are all the s-based tools you should need to cut out the sections of padding.


Cut, place, measure, and remeasure before applying any fasteners. You may have a fun situation like I did where the runner grew wider along its length, almost an inch-and-a-half from one end to the other. You can compensate by cutting a few of the padding rectangles wider to match, or you can not care like I did. Either way, you're simply centering the padding on the tread, 'grid' side up:


Next came the part where I learned why most online guides to carpeting stairs encourage you to have some specialized tools, like knee kickers and stair tools. This project is far from impossible to complete without them, but it likely would have gone much quicker with them. It also might have gone faster with a partner, but the wrong pair could just as easily get in each other's way. Again, I did this myself with just a hammer and tacks, and it's holding up fine.


Start at the very top stair, back of the tread. Line the carpet up as squarely as appropriate so the runner doesn't veer to the side down the stairs - you're going to wind up straddling the runner a little awkwardly, especially at first, but once you have the first riser's worth nailed down it gets a lot easier to manage. I started with just a nail in each back corner to hold things in place while I double checked that everything was positioned the way I wanted, then sank several more at the back of that first riser. From here on out, I followed a simple two-part formula:
1) Work small, work tight. Pull, push, smooth, and hold (with your free hand) each section of carpet on which you are working, generally about a riser and a tread's worth at a time. Look ahead and behind to make sure you're not bunching the carpet, and once you're set, hammer it down:
2) Work from one side of the stair to the other. This will help with the above. I wound up with a nailing pattern very similar to my stapling pattern, generally with one fewer nail across and one more nail along the depth.
Lather, rinse, repeat, repeat, repeat, and if then get out the utility knife and/or shears to trim the very bottom.

One other note - keep all the nails to the edges of the carpet. The padding should already be affixed to the stairs, so worry about keeping the carpet from moving - and avoiding any partially sunk nails in areas where feet are more likely to fall.
Saturday, February 26, 2011
A really old project
I just found these photos from a project I completed in winter 2008-9. The downstairs bathroom was largely complete when I got the house, just missing trim:


This was a pretty straightforward project. Given that nothing in this century house is quite square, the only thing I would have done differently if I could go back was the order of cuts. Actually, just the measuring, not even the cuts themselves. I'd recommend starting with the door - it will probably have a different trim pattern than the baseboard, so it's a self contained project:


This trim, incidentally, is a composite from Home Depot, attached with Liquid Nails and a couple of very small brads for insurance. While I'd normally go with real wood in any project, this was one of the first house projects I was trying to complete, and I wanted a low-maintenance solution, something that wouldn't react badly if I missed a bit of paint or sealant. If this bathroom ever gets redone, it would be a top-to-bottom approach and you can bet reclaimed wood would be used for the 'new' trim.


This was a pretty straightforward project. Given that nothing in this century house is quite square, the only thing I would have done differently if I could go back was the order of cuts. Actually, just the measuring, not even the cuts themselves. I'd recommend starting with the door - it will probably have a different trim pattern than the baseboard, so it's a self contained project:


It also will dictate - minimally, in all likelihood - the actual lengths you'll need for abutting pieces. Especially if your house isn't quite square, like mine, you might find the door trim in the above picture is forced to drift a little from true, thereby altering the baseboard piece to its right.


This trim, incidentally, is a composite from Home Depot, attached with Liquid Nails and a couple of very small brads for insurance. While I'd normally go with real wood in any project, this was one of the first house projects I was trying to complete, and I wanted a low-maintenance solution, something that wouldn't react badly if I missed a bit of paint or sealant. If this bathroom ever gets redone, it would be a top-to-bottom approach and you can bet reclaimed wood would be used for the 'new' trim.
Tuesday, February 15, 2011
No more squirrels!
Repeat readers of this blog will find in this post not only an alliterative description of themselves but also a long-forgotten project completed with help from a remarkably recurring source.
The project: fix the hole in the porch soffit.
After removing the temporary covering (particle-board - a bad idea in retrospect since water can, and does, sneak under the eave) I took my saws-all to the eave to remove the worn or rotted board sections and create a fairly square opening:


Now for the return of the scrap wood. As you can see, the beams - and some of the plywood under the tar-paper - were also suffering from rot and wear. The 1"-square sticks made for great extensions on which to attach the new eave board, and the backing board behind the gutter. I miter'd the near end of the sticks at a slight angle to roughly match the slope of the beams and allow the backing board to sit straight.

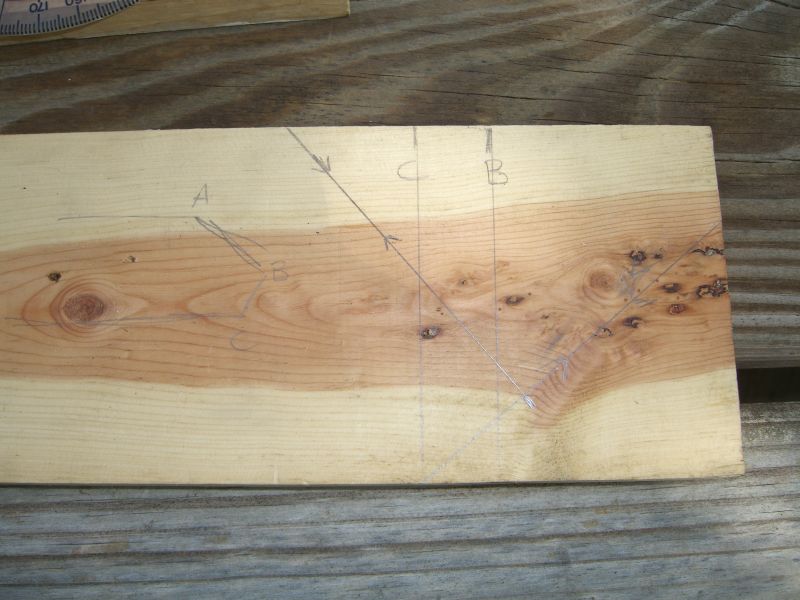
Now came a long series of cut-to-fit measuring, remeasuring, cutting, positioning, recutting, and so on. I would have liked to do this with only two boards - eave and backing - but the eave is at least 8" deep. While I could have bought a wider plank, I decided to rip two pieces of one-by as needed, miter the right end, and cross my fingers. This took a little longer than it might have otherwise, but it saved me four bucks and a trip to the lumber yard.

The backing board was more of a challenge. I don't know how the original board and the trim on the peak to the right of this hole originally fit together - the boards were rotted and/or worn back several inches - so I needed to dig out a tool I hadn't used in years - my trusty grade-school protractor:
Remember, this is all cut-to-fit, so make a cut, see if it fits, then cut more - I made the longer 45-degree cut (from the top of the board heading down towards the right) first and, after wrangling the piece up and down the ladder several times, decided there was no need to make the second, lower, shorter, 45-degree cut; doing so might have exposed a bit of the eave boards, actually.
Some Abatron putty to smooth out the transitions:

Paint it, and let the squirrels roost somewhere else:

Only (only!) two things left to do on the porch - rehang the gutter (that's going to be a big post) and finish painting the ceiling. This is gonna look so pretty...
Subscribe to:
Posts (Atom)